Rhino Horns, Toenail Clippings, and My Jeans

clippers web

Fifty thousand dollars, the announcer on NRP was saying. An illegal poacher could get $50,000 for the horn of a rhinoceros!  Poor rhinos.  The creatures are being increasingly targeted by poachers, who kill them just to obtain their horns. It’s becoming a significant problem and decreasing the popoulation of rhinos around the world. (Read the NPR article here.)

The use of rhinceros horns in traditional Chinese medicine has been around for centuries. When ground into a powder and mixed with boiling water,  the horn has been long believed to cure many ailments in China, including rheumatism, gout, and fever. In Yemen, the horn is often used as part of ceremonial swords, and in Greek lore it was said that bowls made of the horn could detect poisons. (This part might have actually been true, as the alkaloid poisons might have visibly reacted with the keratin in the horn.)

Because the horns are so valuable as a supposed medical powder, poachers are killing the animals  in order to sell the horns to many Asian countries, especially Vietnam, which has become one of the largest importers of the horns.

Although there is really no documented evidence of the horn’s ability to actually cure diseases, it is increasingly being marketed as an antidote to many illnesses including cancer, and has become extremely popular. Several websites claim that Vietnamese are demanding the powdered rhino horn in ever-increasing numbers.

Some people believe that the poaching laws need to be stronger; others believe that legal “rhino farms” should be allowed so that the government or legal traders can sell horns without killing animals, gradually putting the poachers out of business.

I read a few articles about this on the web; this one from PBS concludes with the statement that in terms of the health claims, you’d be just as well off eating your own nail clippings. This is because the famed rhino horn is composed primarily of keratin, with a stronger core of calcium and melanin.  Keratin is the material that comprises our hair and fingernails, and the hooves of many animals.

When I thought about eating toenails, though,  I remember a very special time at the DMV.

I was waiting in an uncomfortable chair in a packed waiting room, with random numbers being called up on screens and all walks of life around me in various stages of frustration, distress, or boredom.  I watched person after person walk up to get a driver’s license photo, I observed someone eating something from a Tupperware that smelled suspiciously like sauerkraut, I blinked at the lady who was talking to a very small dog with the word, “Poop! Poop!  Poop!” written in cursive on a pink collar when….something even MORE interesting caught my eye.

Or actually, my ear. “Clip! Clip!” went the sound.

“What IS that?” I wondered to myself.

“Clippy Clip! Clippity Clip!” I heard again, and then “zing!” something small snapped into my jeans leg.

“Aik!” I squeaked, brushing at my leg, thinking it was some kind of bug. The thing fell to the floor, and it was not, in fact, a bug. It was a long, yellow toenail clipping.

With growing horror, I turned my head to the left. One empty chair away, a man in his mid-50′s had hoisted one long hairy leg atop the other knee, had removed his sandal, and was busy clipping the discolored nails on his long knuckly toes.

He stopped to examine a piece of nail that had not automatically fallen from the clipper, the way I might pick up a piece of string that the vacuum cleaner ran over, then he wrinkled his nose and dropped the piece to the floor.

He continued snipping away, moving carefully from toe to toe. “Zip! Zing!” more clips flew out at impossible speeds in random directions.

I moved quickly to an empty chair further down my aisle.  I could NOT believe that he was doing this — clipping his nails, here, right HERE, in the Department of Motor Vehicles! I grant you that it is a very boring place, staffed with chronically unhelpful workers, full of bureaucratic forms.  I could handle a discreet nose-pick here or there. I could even tolerate a fart or two. (Who hasn’t let one loose in a waiting room, am I right?)

But the fact that his nasty nail landed ON MY JEANS was repulsive. And HE was repulsive!  And if disgusted stares or The Evil Eye had any actual power, his feet would already have disintegrated into black dust after incinerating themselves in the heat of my hatred.  But he was blatantly oblivious to my hate, and what was even worse — nobody else seemed to be noticing this.

Really? I thought. It’s come to this?  He gets to clip his nails in here, and nobody else even thinks it’s gross?

He finished the one foot in no rush, then re-sandaled it and hoisted the other for a quick pedi.

I could not look away. It was worse than rubbernecking an accident on the highway. “Please, God, make it stop!” I was wailing internally, but he did not stop; at least, he didn’t put away the clippers until he had diligently finished all of other smelly digits. And then — seriously, he picked a piece of nail out of the clipper and CHEWED ON IT.  Then he slipped the silver tool back into his pocket and picked up a newspaper.

When my number was finally called, I was relieved to move away – FAR away from the Clip Zone. But I never forgot the incident, and even though I am now experiencing a little PTSD just thinking about his toes, I realize:

If that gross man can clip and eat his toenails, why can’t other people do it too? Maybe the people who are dependent on the rhino horn are just mislead. If it’s keratin they want, keratin they should get, and maybe it can come from their VERY OWN FEET! Think of it! Instead of selling rhino horns, maybe the little apothecaries should start selling DIY guides. “Step one: Clip Your Nails. Step Two: Grind Them Down. Step Three: Mix With Boiling Water.” and Voila! A new way to get your keratin, right?

Maybe we can even track down DMV-man and have him farm out some extra toenails. He definitely  had some long ones going on there.

I’m not trying to make light of the rhino plight. Although the rhino has never been even close to my favorite animal (seahorse, hummigbird, lemur) and in fact is probably sort of low down on the list, I do NOT want to see them being killed for their horns. I do not like to think of people killing them for a horn that has no real medicinal value, leaving their corpses spread across the land.

I guess I’m trying to use a bit of humor to spread the word about the plight of the rhinos. So please, if you ever hear anyone say that they believe the rhino horn actually works medicinally,tell them that it doesn’t. Tell them to try their own toenails instead.  Tell them not to support the killing of innocent animals.

Clip.

Welcome to That Lady’s Ass – I mean, To Your Kindergartener’s Graduation!

isabel inder grad 1 web

My daughter graduated from kindergarten today, and there was a song performance and some little dance-like routines.  It was probably all super-cute, although I have no way of knowing this for sure, because:  A) My  line of sight was blocked by a seething mass of outstretched arms and cameras of all styles and kinds and varieties, as well as many asses of all kinds and varieties, and B) I wasn’t sure if I was on a trading floor or at a children’s ceremony.

One of the first things the kindergarten teacher told us, in a very nice and polite voice was, “Welcome, Parents! Please remain seated during the ceremony so that everyone can see. If you need to get a picture, please stand at the back of the room! And please, do not stand on top of the folding chairs.”

As soon as she stepped away from the mike, parents immediately stood up en masse and started elbow-grappling for position, and some of them in the back STOOD ON THEIR FOLDING chairs to get a better view.

As the kids filed in, wearing caps and searching the audience for their parents and waving, the audience got more intense.  People started pushing their way to the front and standing in front of the first aisle, running into the “off limits” area where the children were walking, and squeezing un-apologetically into other people’s aisles (like mine) to stand in front of anyone they felt like (including me) in order to get a better shot with their video camera. Which is how I got to become intimate, so to speak, with several asses.

One lady sat down absently in my lap, so absorbed in her videotaping that she forgot, apparently, that she had scooted into a different aisle and was not actually standing in front of her OWN seat. She did not say anything about this faux pas; just got up, gave ME a “look”, like, “What the hell are you doing there in MY seat?” and went into another aisle to film.

After a few minutes, I suddenly smelled Ban roll-on. There was a male armpit at the side of my face, just a few inches away, and a camera in front of my face. So even though I could not see my daughter on the risers, I could now watch her through this man’s little Camcorder screen as I felt his warm breath on my neck.  It was a special moment, I tell you!  I had to say, “Excuse me?” to him several times before he grunted and moved his body and arm a few inches to the right, at least giving me some breathing room.

Amado and I laughed together about the man who ran up – so eager to film his own child receiving a diploma – that he started blocking the pathway for kids to walk up. And as soon as he did it, several other people did it (including my friend the Asslady), until the teacher finally had to say something to make them move.

It was crazy, though. People! This is kindergarten!  I had been expected some kind of filmzilla behavior, but this was beyond what I’d imagined. It made me laugh and feel depressed at the same time.

As a photographer, I love capturing moments, and I love recoding special activities. But all of these dozens of parents were so intent on filming from the best angle, and so completely enthralled in their devices, that they were not really present. They were watching, but not watching — they were seeing their child not in front of their eyes, but through a small digital screen.  The complete zeal that engulfed the room made me feel melancholy; these moments that we try so hard to capture are so fleeting, and it felt suffocating to be around all of the filmers who were in the process of missing the very thing they were trying to preserve forever.

So instead of throwing my elbows into the mix and frantically pushing for territory, I craned my neck far to the right so I could see Isabel through a gap in the asses and arms and cameras. I could see her small face. She was solemn, although at time she turned to the girl next to her and gave a small giggle and jumped up and down slightly. She twisted her hair around her finger. She spotted me and Amado and waved, then immediately pulled her small hand in, unsure if she was supposed to wave or not. She smiled at us. She tapped her feet. I could see her little mouth open very wide as she sang her favorite songs. Her hands were plump and sweet, twirling around, as she did the “moves” she’d practiced for the songs.

When it was her turn to accept her diploma, I could not see her at all. But I watched her step back onto her spot on the riser, happily holding her diploma in one hand, and she made eye contact with me and Amado again, and she smiled. She couldn’t have done that — shared the smile with me — if I’d been glued behind a tiny screen, watching her through a digital filter. It was her and me, right there. And I loved it.

isabel kinder grad 3 bw web


Creamcheese, Diapers, and Expensive Cookies

cookies web

I was craving a New York style bagel this morning, the kind I used to get in little bagel stores near Columbia U., when Jen and Nandita and Robbie and I would go for a study break snack.  I pulled into the Costco lot, idly thinking about these bagels and about the photos I was going to pick up (would they have good color? Did Costco believe me when I checked the “do not autocorrect” box? Because Costco seems to usually really LOOOOVE doing Autocorrect?)

Costco was still closed. I was irritated. Did they not KNOW that I was there? Did they not GET that my schedule was geared to an earlier opening? Could they BE that insensitive? Damn you Costco, you jerk-offs, I was thinking to myself.

Should I just wait? Then I noticed a Chompies restaurant out of the corner of my eye. I decided: “Hey, I’ll check out this Chompies place. Maybe they have bagels there? I’ll just go see.” (A big hint to help me out was the large bagel right on their logo, and the word BAGEL all over the outside of the store.) You can’t get anything past ME at 9:30 am in the morning. I’m pretty sharp.

So I went into the Chompies, and Oh My God. Not only did they have big rows of bagels and actual metal tubs of cream cheese, they had knishes and strudels and Challa bread and mock subway signs. It was really awesome — I mean, I knew the signs were kind of cheesey, but they were still AWESOME.  At times I still miss NYC, and seeing a subway sign makes me nostalgic for the good times without any of the smelly puddles or crowded bodies or hot subway cars or incessant waits with just hot stinky air blowing down the subway tunnel when you craned your neck to see: Are there any lights coming? Anything?

So I ordered a toasted garlic bagel with cream cheese, and then I remembered how: Oh yes! In NYC, they put about a whole pound of cream cheese on your toasted bagel; so much cream cheese that it drips and spurts out the sides and gets all over your fingers and hands and shirt. And if you’re like me, a person who likes cream cheese but doesn’t LOVE it in the sense that you would put an entire block of it onto your bagel, you have to wipe some of it off.

I smiled to myself as I began the moves I remember doing back in college: Smashing the bagel together and wiping off the huge amount of excess cream cheese with the waxed paper wrapper and extra napkins, then holding it in my hand like a full warm baby diaper, looking for a place to toss it out.

That’s how the diapers come in.  Seriously, there was SO MUCH cream cheese on this bagel that my excess cream cheese, wrapped up in the paper wrapper, had the same heft and warmth as a newborn’s poopy Pamper.

chompies wrapper 1 webLook at that ! Just look! That whole folded over paper is full of cream cheese. And that’s not even ALL of it.  There was more in the 3 napkins I already tossed. I can’t even believe how much cream cheese went onto that bagel! I could have creamed 4 other bagels with the excess. It’s actually a shame I had to toss it out.

I guess that a)cream cheese must be inexpensive and b)most people in NYC must loooove themselves some cream cheese, if that is the norm.  And I also just realized that c) “I could have creamed 4 other bagels” sounds really, really wrong. So sorry about that. Just pretend I never said it, ok?

I do remember that all of my friends would eat all of their cream cheese just as it was, and tease me for wiping much of mine away. (Except for one friend who always got her bagels toasted with just a sliver of butter.)

Anyway, so after that awesome diaper-loaded bagel, I saw that Chompies had windows full of gorgeous sugar cookies, and I got a box of them for my daughter’s last week of kindergarten.  They were beautiful, spotted with sprinkles, and delicious (I snuck one, of course.) And $12 for 47 cookies.

So there you have it: A morning without Costco can lead to good things, like NY style bagels, handfuls of warm diapers, and yummy cookies.  The path less taken CAN be more fun (if slightly more expensive).

So I need to know: How do you like your bagels?  Do you like the crazy amounts of cream cheese? Do you prefer butter? Inquiring minds want to know….

High Pass Filter Sharpening + Free Action!

Hello, everyone! I’m back with an article on how to do high pass sharpening in Adobe Photoshop and Elements. Keep reading for the tutorial and the link to the free action I created using the high pass filter. The freebie will be available at my Pixels & Co. store starting this Friday, 5/17/13.

The High Pass Filter makes me think of an awesomely gorgeous mountain pass high in the Andes. But in reality, it can be used to provide sharpening to your photos.

water droplet sharp for high pass

Keep in mind that there are many ways to sharpen your photos. There is the Unsharp Mask method, the Smart Sharpen method, the LAB lightness channel method, and combinations of all of those.  Add in High Pass Filter, and it starts to get difficult to decide what to use when!

I find that for most everyday uses, it doesn’t actually matter that much which method you use. If you’re emailing the picture to friends and family for fun, posting it on Facebook, or printing a 4×6″ copy, you probably won’t be able to tell much difference between the various sharpening  techniques. It becomes more critical when you’re working on a very special picture, printing something at large sizes, if you’re entering a photo contest, or if you’re displaying your work for clients.  In those cases, it’s a good idea to test out several different sharpening methods on your photo to see which works best.

If you want to give High Pass Filter a try, you can do it in either Photoshop or Elements. The High Pass filter works by finding lines in the photo and increasing the contrast around them.  You get to select how strong the effect will be by pulling a slider bar back and forward.  Here’s a sample workflow.

This following procedure works the EXACT same way in both Photoshop and Elements 11, although my screenshots are from Photoshop.

Start with a picture and make a duplicate copy of it. Then select Filter — Other — High Pass.The duplicate layer will suddenly look gray with grayish outlines, and you will get a dialog box with a slider bar that you get to adjust. I usually start with about 5, but try pulling the bar back and forward to see how the picture changes. The more dramatic the outlines in that box, the more sharpening you will get. Sometimes less is more, though — too much sharpening, as with any method, can look fake with obvious halo outlines around edges in the photo.

Once you like the look of the lines, hit OK.  Now change the layer style on the duplicate layer  from Normal to Overlay. Adjust the opacity until it looks “right” to you, somewhere between 20-80%.

Here are some screen shots to help you better  understand the technique.

high pass document page 1 web

Once you have duplicated your background layer, you can run the High Pass Filter on it.

high pass document page 7 web

high pass document page 2 webYou can pull the slider bar back and forth to change the radius. As you do that, you will see the line edges in the gray picture get more or less contrasty. The more contrast you see – the higher the radius – the more sharpening you will get.

high pass document page 6 web

Once you have selected the radius, hit OK.  Now, click once on the High Pass layer in your layer palette to select it. Change the layer mode from Normal to Overlay. You will see the picture change from gray back to color, although it will look a lot contrastier.

high pass document page 3 web

Now change the opacity of the layer from 100% down to around 40% to see how you like it. If it looks good, stop there! If it’s too sharp and contrasty, reduce further. If you liked it higher, change it back. This part, like adjusting the radius on the high pass, is up to your eye to determine what works for the photograph. As you become familiar with the High Pass filter, you can try using Hard Light, Vivid Light, or another setting instead of Overlay. This will change the look of the sharpening in your photo, and some people prefer these setting to Overlay.

high pass document page 4 web

You can do this in Photoshop Elements, too.  In Elements, open the picture you want to sharpen.  Then in the menu, you go to Filter — Other — High Pass, just as in Photoshop. You do the exact same steps as above. This is one of the few techniques that works exactly the same way in both programs!

I hope this gave you the confidence and knowledge to try out the high pass filter.  I use it for sharpening photos myself, in addition to the LAB method and the Smart Sharpen method — and I hope it works well for you, too!

I have a free action for you that uses the high pass filter. It will be available starting this Friday, 5/17/13, so please check back on Friday to get the download link!  I’m excited to share it with you all. Here’s the sneak preview of the kit cover:

high pass preview template

If you have questions,  thoughts or comments about sharpening, please share! And thanks for reading.


Sharpening Your Photos – Methods & Techniques

pink flower sharpened web

Raise your hand if you’ve ever been confused about when to use Sharpen, Unsharp, High Pass Filter, or Lab Sharpening. Raise two hands if you’ve never even heard of some of these.

I do a LOT of sharpening on my photographs, and I will tell you which techniques work best for me in various situations, and why I use them.  I also have a free Sharpening Action Set called Sharpen Up! Available at Pixels & Co. so you can try out a few of the techniques.  (You do have to register as a site member to download it, but the site won’t spam you, I promise!)

sharpening preview Valencia

Why do people even need to sharpen pictures? The main reason is to make details look sharper and crisper, especially if the picture is “soft” to start.  Crisp details are very appealing to the human eye, and we tend to prefer pictures with good focus and crisp details.  Sharpening can’t bring back detail in a picture that is badly focused or has a lot of motion blur, but it CAN take a good photo and help it look outstanding.  And if you apply selective sharpening to specific areas of the photograph, you can help draw the eye quickly to the main subject.

Sharpening  works  by finding the boundaries between color changes in pixels, and making those boundaries more obvious — in a way it darkens darks and lightens lights where they meet up.  A little of this can make a photograph “pop” but too much can add a fake looking “halo” around certain objects in the photo. This distracts from the overall image and makes it obvious that the picture was over-sharpened.


sharpening example page 2 web

Click on the graphic below to make it larger. You can easily see the differences between the original, the sharpened version, and the over-sharpened version when you look at the petal edge and the green background.

sharpening example page 3 webHere’s another close-up where you can see the oversharpened “halo” around edges of parts of the inside of the flower.

sharpening example page 5 web

There are many discussions about what sharpening technique is best and why.  Several common Photoshop techniques are:

  • Smart Sharpen
  • Unsharp Mask
  • LAB Sharpening
  • High Pass Filter Sharpening
  • Combination:  Smart Sharpen — Unsharp Mask — Fade Luminosity

Photoshop’s Unsharp Mask is still one of the most popular ways to sharpen a picture. It does make the picture sharper overall, even though the word “unsharp” in included. (This term is a carry-over work from an old film photography technique.)  Also very popular is the Smart Sharpen feature, which has more control than the Unsharp Mask.  Many photographers prefer to use Smart Sharpen — which is newer — than Unsharp mask, claiming that they have greater control over the sharpening, and that there is less halo creation when Smart Sharpen is used.  If you don’t get carried away and over-sharpen, Smart Sharpen can be a very good technique. Sometimes, though, it can make parts of the picture look too sharp when others still don’t look sharp enough.  In this case you can use a layer mask to erase the additional sharpening where it is not needed, and add sharpening where it is.

LAB sharpening is a technique in which the photo is converted from the original RGB color to the L A B color space, sharpening is applied to just the luminosity channel (the black and white data), and then the picture is converted back into RGB color.  Many people feel that this method gives a good overall sharpening without obvious halo artifacts.

LAB color space consists of a Lightness Channel, an a channel (for green and magenta) and a b channel (for yellow and blue.)  If you convert a picture to LAB, it will then have those three channels. You can select the Lightness channel and apply sharpening to it using Unsharp Mask or Smart Sharpen before converting the image back to RGB.

I like the way LAB sharpening works and use it often on portraits and general pictures.  I  always do the sharpening on a copy of my original, and mask out areas where sharpening should not appear (skin, etc.)

water droplet not sharpened web

Photograph Harold Davis has a great tutorial at Photo.net about using the LAB method for sharpening photos.  He comments that LAB is useful because you can sharpen just the black and white areas, which are usually the lines between objects or the separation areas that NEED sharpening:  “Many shapes are outlined in black, so black is what you want to sharpen,” and that you can avoid the unattractive look that color pixels get when they are sharpened by using the LAB technique. He also explains why he may apply sharpening in multiple passes to the same photograph in order to provide the optimal amount of sharpening to different areas of the picture. (Harold Davis, article available here.)

Even if you don’t really “get” what LAB is,  (most people don’t really get it, even if they sharpen using LAB) — try using the LAB sharpening method anyway. You may end up really liking the results!  One of my sharpening actions in the freebie uses the LAB method, so if you have Photoshop CS2+ you can try it out and see how you like it!

I’m certainly not against researching and understanding the technical aspects of how sharpening works. I’m an engineer, so I actually enjoy reading the technical details! But I believe it’s crucial to do the hands-on work of actually trying multiple techniques on the same photo to see how the techniques work, and when they are best for YOU.

The High Pass Filter method for sharpening also involves finding and sharpening edges preferentially. To use this method, you start by duplicating your background layer. Then you apply the High Pass Filter to the top layer, change the layer from normal to Overlay, and adjust the opacity.  Choosing the right values for the High Pass Filter and the opacity of the layer are where the art comes in — each photograph may require a different value.  However, many photographers like this method because it’s easy and effective.

So how do you choose which to use and when?  Through trial and error, here’s what I like to do.

Portraits:  LAB sharpening. Why? It gives a nice crisp overall sharpness without making the skin too pixelated and without adding halos.  Even so, I still often use a mask to erase sharpening where it is definitely NOT wanted, such as skin.

General Photos – flowers, landscapes, etc:  Combination of Smart Sharpen, Unsharp, and then immediately Fade Luminosity at 100%. This gives the effect (supposedly) of sharpening just the lightness channel, as in the LAB method.  I like using this method on pictures that have lots of fine details, like flowers or tree branches. I just have to be sure that I don’t make it look too “crispy” and fake.

Sharpening Low-Res Pictures (800dpi) scrapbook layouts for web: Unsharp Mask with settings of amount = 150%, radius = 0.3, threshold = 0.  When I use “save for web” afterwards, these settings seem to get the 700 or 800dpi photos a good crisp look that works well in the scrapbook site galleries.

 Here’s a sample work-flow using a sharpening technique.

  1. Start with the photo to be sharpened.
  2. Duplicate the background layer.
  3. On the duplicate layer, select Filter — Sharpen — Smart Sharpen.
  4. Use settings Amount = 75%, radius = 0.6, angle = 0, Remove: Lens Blur.
  5. Then select Filter — Sharpen — Unsharp Mask.
  6. Use Settings Amount = 55%, radius = 0.7, threshold = 4.
  7. Then go into Edit — Fade Unsharp Mask.
  8. Use Settings 100% and under the drop down arrow for Mode, select Luminosity. Then OK.
  9. Now you have a sharpened layer on top of your unsharpened b/g layer. Add a layer mask and brush in the areas where you do NOT want sharpening.

I mentioned that I like this method for general sharpening of landscapes & random pictures of things. For people, though, I sometimes prefer the LAB method, and then I mask it out in areas of the face where it’s too strong or where it created a halo.  Here’s an example of how the Smart Sharpen/Unsharp/Fade Luminosity compares to the LAB method.

sharpening example page 6 webIn the close up, you can see that there is not really too much difference between the methods for this particular pictures of a tree at sunset.

sharpening example page 7 web

But in this example of a portrait, you can see the difference more clearly between the techniques. The LAB does a better job sharpening edges and not making the colored areas pixel-y.  It does oversharpen the facial edges by nostrils and chin, and those will need to be masked out.

sharpening example page 8 web

sharpening example page 9 web

In a future post, I’ll show more about how to use the high pass filter for sharpening. But I hope that this tutorial gave you a new insight into using the LAB method to sharpen in Photoshop. Give it a try if you have never used it. See what you think! It might end up being your secret final step to a perfect photo.

Thanks for reading!

Skin Softening Made Easy!

Hello, everyone! Today I want to teach you how to soften skin on a Photoshop portrait.  You may have noticed that the extremely high resolution of today’s digital cameras mean that every pore, wrinkle and blemish is quite faithfully reproduced and possibly even made more prominent, depending on the lighting. I often rely on Photoshop techniques to soften the skin to a more gentle look for professional portraits.

I do sell an action to soften skin at Pixels & Co.,  and of course I’m going to market that here (ha!), but I’m also going to give you a tutorial on how to do it yourself, too.

Skin Softening Valencia  preview

There are several common techniques that I’ve found from researching the web and books on Photoshop editing: Surface Blur, Gaussian Blur, and the green channel technique.  It’s ALWAYS important to do the softening on a separate layer and mask it in. That means to apply it just where you want it, like on forehead, cheeks, neck — NOT on the eyes and mouth, where you want sharp details & shine.

First step: open a portrait that might benefit from some skin softening. Here’s a picture of me. As you can see, I have the dewy skin of a 19-year-old model (<—SARCASM ALERT!), but just for the heck of it, let’s apply some softening anyway.  I start by duplicating my background layer and renaming it as Softening Layer.

blog-example-1

Next, I’m going to use the Surface Blur technique on the Skin Softening Layer.  To do this, select FILTER from the top menu bar on your Photoshop screen.  You’ll select FILTER, BLUR, and SURFACE BLUR. A dialog box will pop up. Enter Radius = 14 and Threshold = 6.

blog-example-2Now you’ll see that the entire picture looks softer and a bit blurrier.  In fact, it will probably be  TOO blurry.  Here’s now to fix it. We’re going to change the opacity of the layer to where it looks just right (this will vary with each photograph you adjust, but start at 50% and see if you like it.)  We will also add a mask to the softening layer. Then we will brush away the areas that should NOT be soft — places like eyes, skin, eyebrows, hair.

blog-example-4This is a quick and easy technique to gently soften skin on photos with harsh, direct light that make pores and wrinkles look too apparent.  Just be careful not to over soften the skin. Using the softening at 100% can look plastic and fake. Adjust opacity of the softening layer until it looks right to you.  I always want people to look at the picture and say, “Wow, I look good!” instead of, “Yikes, what did she do to my skin?” Click on the picture below to enlarge it so you can see the differences between them.

blog-example-5

There are more elaborate techniques to soften skin, too. One that I love involves splitting the picture up into its component channels (red / blue / green), and using the green channel as a mask to apply softening.  I find that this gives a very natural-looking softening in just the right areas of skin.  You can also add a texture layer to add some texture back IN after you’ve softened the skin. This might seem counter-intuitive, but sometimes it looks good to remove the “real” texture and add “fake” texture in for a very smooth, even skin appearance. In addition, I usually add a brightness/contrast layer once I’ve softened the skin, too. This is because adding the softening can also take away some of the natural shine of the skin, and by adding the brightness layer, I can get that back in.

Obviously this is not something you would do on each and every portrait — advanced techniques are usually done on those very special portraits on which you’re willing to spend a lot of time and energy.  Usually, to be honest, I love people just the way they are, wrinkles and all.  For my everyday pictures of myself, my family and my friends, I don’t soften skin. But clients don’t necessarily love to see their wrinkles highlighted by bright lighting, so softening can come in VERY handy!  And sometimes, like when my 19-year-old skin is just pretending to be 41-year-skin, I might pop out the action and run it on my own photo.

I wrote an action using this sophisticated green channel technique that is available for CS2+ Photoshop users at Pixels & Co.Unfortunately, I cannot make that technique available for Elements, because the Elements program does not allow channel splitting on RGB files.  However, you can still use the Gaussian Blur and Surface Blur techniques in Elements for skin softening!  In fact, the action that runs in Elements uses the Surface Blur technique.

If you do want to buy my action at Pixels & Co, I promise that I will be available to help you use it if you’re stuck, confused, or just a first-time action user. You can IM me through Pixels & Co or send me an email through this site, and I will get back to you ASAP with advice. I really love using actions, and I hope it can make your workload easier, too!

Thanks for reading along, and have a great day hanging out and/or softening skin.  :)


Pixels & Co iNSD Blog Hop!

Hello, everyone, it’s Jennifer Valencia here, and  I’m excited to be part of the Pixels & Co.  iNSD DESIGNER blog hop!

How this works:  Visit each of the 19 Pixels & Co. designer blogs in order, and collect the special letter or number from each blog.  Once you have all the pieces, return to the main Pixels & Co. site and use the letters/numbers in the order they were collected as a coupon code to download the blog hop kit for FREE.  Keep reading to find my letter at the end of this blog post, and a link to your next site. Here’s a preview of the kit!

*Pixels & Co. is zooming with traffic and customers. The owner is aware of the site slowdown and the team is working hard to increase server response. Please try back if you can’t get on right away. It’s a great kit, and we definitely want you to have it!  *

pco_moreorless_preview

A bit about me: I write actions and photography eBooks for Pixels & Co.   I love using actions because they make my work quicker and easier.  Some of my favorite actions are the High Key Black and White  and the Black and White Beautiful because my clients love the clean timeless look of black and white, and I love b/w too (especially when I want to use a specific kit that I LOVE but my photos clash!)

bw-preview

In this post I want to cover two topics. First is how to use my part of the free kit. And second, I want to talk a bit about aperture — it’s one of the most common questions I get about photography.

How To Use The Action Set: Retro Postcards

My part of the free kit is an  action set for you called Retro Postcards, which runs in Adobe CS4+ and Elements 11.  These actions give a vintage, retro feel to a photo.

Retro Action Valencia Template

I love this orange chair at my parents’ home in Chicago – and I adore how the kids are  nestled together. I wanted to try a retro/vintage look  for fun, and then I wanted to erase the “retro-ness” on their faces –  b/c kids’ faces are just not meant to be retro, am I right? Here’s how I did it.

retro-sample-for-webpage-2

First I started with a photograph in CS4.  I made sure that my photograph file consisted of just one layer called Background. (That’s what your layer is always called, unless you change it deliberately.)  My actions are designed to run with Background as the starting layer.

I ran the Basic Retro action and ended up with these layers on top of my background. Note: I usually write my actions to be non-destructive (the background layer is still there), and I make the color layers editable. Although it may look daunting to see a big stack of layers there, I do this because it gives you more options to tailor and tweak the action. I just hate it when I run an action that merges all the layers down so I can’t tweak them — if I don’t like the results, I have no options! I spend a lot of time writing the actions, and I want you to be able to use them as effectively as I do on my own photos.

retro-sample-for-web-3

As you can see, there is a stack of layers, some visible and some invisible. Again, I do this to give you OPTIONS and hopefully make it very easy for you to use the action. Here’s an example of what to do with all of these layers!

retro-sample-5For these pictures, I merged all of the adjustment layers into one, and added a layer mask. Then I painted over their faces to let the background show from below. Voila! Vintage postcard with natural skin – just what I wanted.

retro-bold-sample-3

You can change the look of the photo by adjusting opacity of the layers, or editing them directly. Here’s an example using the Retro Bold Action on a skyline in Vancouver:

retro-bold-sample-1Here’s the way to tweak the Retro Bold Action results.  (If you’re wondering: The reason I didn’t officially “group” the results is because I wrote the action to run in either Photoshop OR Elements, and the groupings are hard to ungroup in Elements.  Sometimes I write separate actions for Photoshop & Elements, but in this case, it’s just the same action that works in both programs.)

retro-bold-sample-2

Some information about aperture.

I wrote a post about depth of field at the Pixels & Co. blog, which I hope you get a chance to read.  I’ve also put some excerpts from my eBook Captivating Candids here to help explain the basics of aperture. Please feel free to stop by the Pixels & Co. forums to ask any questions you have about photography or scrapping!

candids-section-8-aperture-web

candids-section-33

candids-section-10-apertureI hope that brief overview of aperture helped explain the concepts. And I hope that you try out my action that comes with the free kit!

————————————————————————————————-

 And now for the blog hop specific information:

My letter  is:  G

The next site you need to visit is Tiffany’s, at her site Simply Tiffany Studios.

————————————————————————————————–

Here is the entire list of blogs in order. Have fun!

Start Here
Jennifer Valencia Photography  <—  This is ME!  My letter is G.
Simply Tiffany Studios
The Queen of Quirk
JustJaimee
Mye De Leon
Dawn by Design
The Ardent Sparrow
Robyn Meierotto
Karen Funk
Crystal Livesay
Scotty Girl Design
Karla Dudley
Wild Blueberry Ink
Deena Rutter
Celeste Knight
creashens
Mommyish
Jeryn Carlisi
Gennifer Bursett

Super Carrot Deluxe!

isa-and-carrot-3

When I bit into the carrot from my garden, the most startling taste burst into my mouth.  It was as if my tongue had shed cataracts and a thick wet suit, and I was only now tasting CARROT for the first time in my life. It was wholly different from even the freshest organic carrots at Whole Foods. It had nuances of flavor I’d never before encountered in a carrot, and at first I wasn’t even sure I LIKED it.  It was like this:  “Zing! Pow! Ginger-spices-herby bouquet and completely fresh carrot taste, but nothing bitter at all, sweet like fresh fruit and fragrant and orange! KaBAM!”  I did like it, I decided, after I recalibrated my whole mouth to the new meaning of “real carrot.”

Isabel nibbled on one like a bunny and said enthusiastically, “This is delicious, Mama!”

The carrots were tiny – we’d picked them at an inch long, just to see what they were like; curious to find out what was percolating under the organic soil bed. And WOW — those carrots were easily the most carroty carrots I’ve ever tasted.

I suddenly understood what Frances Mayes was talking about in her book Under the Tuscan Sun when she waxes poetic about how the most simple ingredients are so ripe and delicious in Italy, on her land, that nothing more is needed but the tomatoes and olive oil and garlic.  I could see how something so delicious as this CARROT would not even need hummus (even the amazing buffalo flavor hummus from Whole Foods!), because it was so good all by itself.

And it’s not like I’m vegetable-deprived.  My family spend lots of time on Grandma’s farm in Wisconsin where there was a huge variety of garden-fresh produce: red and yellow watermelons, broccoli, strawberries, tomatoes.  And we shop at organic veggie stands when we want. But somehow I’d never before experienced CARROTNESS like this. Have you?

In any case, we love our small organic garden; it’s our patch of verdant life and bounty in a parched corner of Phoenix where the sun is already beating down at 102F at the end of April.  The thrill of picking our our tomatoes, chard, bok choy and green onions is still a surprise to me. When I go to the garden, I feel a bit like a kid on Christmas morning, or someone that has been given a huge present in a fancy bow. I feel proud and eager. And although the money & time put in does not render equivalent bank account savings, it is delivering us additional joy and family together time (Isabel loves to harvest and to help her Daddy plant things…she likes to water….) when we all go out to work on the garden together.

So I say, ‘bring it on’ to that carrot – I can’t wait for more of them to ripen!

Carlsbad – April 2012

isa-on-carlsbad-beach-3

I’m looking at the ocean, gray and hints of dark green tumbling up and over when the waves crash, white foam fizzling out like matches on the watersmooth sand.

The water becomes paler gray toward the horizon and the sky that meets it is a lighter airier gray yet, with  faint silverblue splotches that hint at future brilliance.

Now the sky is lightening FAST – second by second it becomes brighter, like watching a high-speed film of a flower unfolding.

It’s not dawn. It’s 9am, and drizzly. A few plump 50′s ladies are wading around in the pool below me, one of them in the hot tub, a pensive expression. Amado and Isabel are asleep inside the hotel room while I write on the balcony, a cup of room-brewed coffee beside me, my bare feet cold. The air is so clean that  it might wash my lungs with its wet, wild moisture.

Two  attractive young people walk together on the sand, confer briefly, then jog together, her brown muscular legs set off by tight white shorts, his easy gait holding a coiled power. They make running on the packed sand look so easy, and I follow them with my gaze as they get smaller and smaller, converging to the boardwalk far in the distance.

Lines of seabirds soar horizontally across the ocean, following the waves’ rise and fall, flapping in unison, gliding in unison. I think they are brown pelicans.  They move so well together as a unit that they seem like rehearsed dancers; I never tire of watching them fly.

Now Isabel’s small smiling face — she’s tugging at the sliding glass balcony door. I jump up to open and she bursts out, all smiles and tossing hair, hopping with excitement. “Mama! Hahaha! I want to write out here, too!”

We get her small notebook and pink pen; I pull the 2nd chair close to mine – touching – so we can both see. She snuggles her head into my shoulder and I hug her, both smiling, happy. The ocean is roaring.

New Year, New Ventures

I’m excited to announce that in January of 2013 I will be selling photography eBooks and Photoshop Actions at a brand new website called Pixels & Co, headed up by the fabulous Gennifer Bursett.  You can find it here – it will go live in early January. There is an amazing freebie available for those who sign up for the newsletter; it will have some of my Photoshop actions as well as a large amount of digital papers and embellishments by some of the industry’s top designers.  Please check out the new site here: http://pixelsandcompany.com/

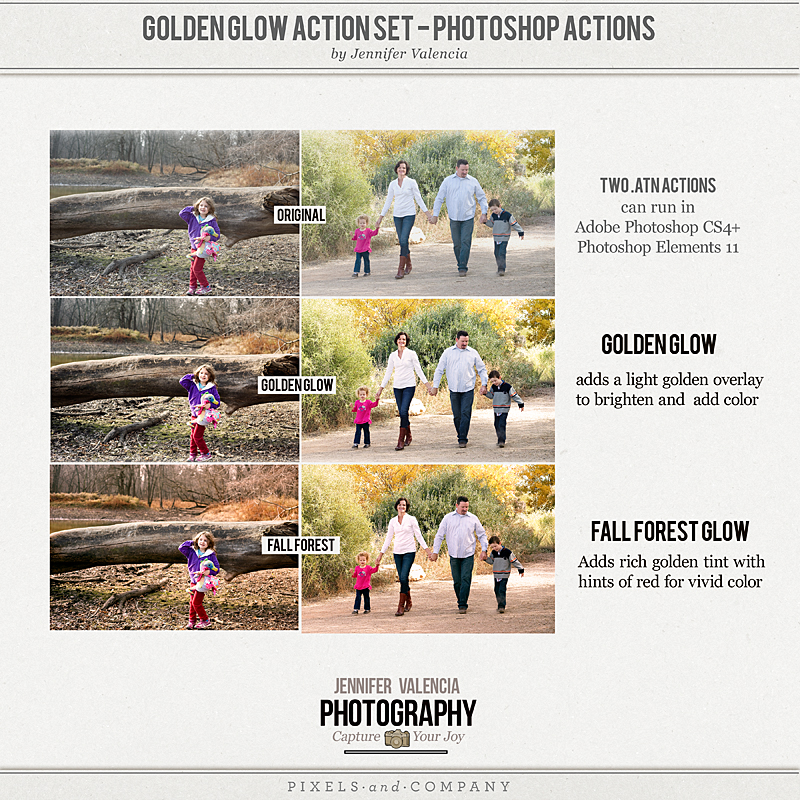
Free Action Set by Jennifer Valencia; coming soon from Pixels & Co.

You can also get a sneak peek at some of the designers here on the Facebook page:  https://www.facebook.com/PixelsAndCompany

Some of the things I will be selling are:

Captivating Candids eBook – Learn How To Get Gorgeous Candids (in a weekend): A 40-page eBook with lots of example photos and instructions.

Black and White Actions – Turn your color photos into crisp, clean B&W.

High Key Black and White Actions – Do you crave the amazing B&W pictures that are popular right now on professional websites with creamy skin and crisp details? Get my action to convert your own photos.

Example of “High Key” Black & White Photography – Cream Skin, Light Whites

Black and White Photography eBook: Learn the top techniques to convert your photos to black and white, and when to use different conversion styles.

I’ll add more updates periodically as we get closer to launching the new site. I can’t wait to offer my photography books and actions to you and share my techniques and tips for getting amazing photographs!


“This One Needs A Little Help”

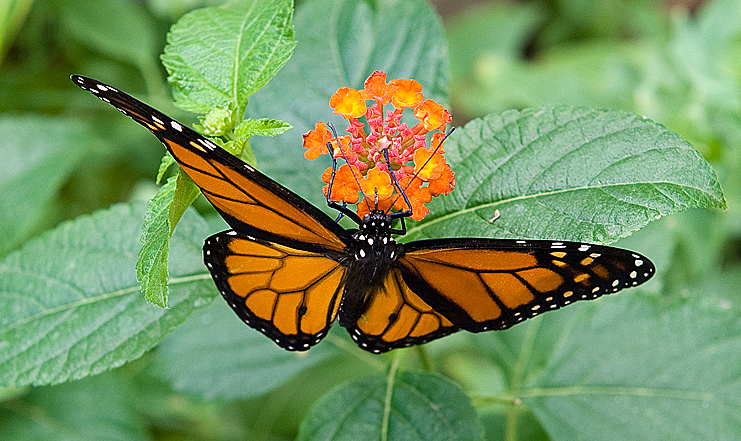
Monarch

Monarch at the Desert Botanical Garden


A few weeks ago, Isabel and I went to the Desert Botanical Garden with friends. Our main stated goal was to visit the Butterfly Pavilion, but of course we were open to any random plans that materialized along the way, and with 5-year-olds in tow, that’s not uncommon.


So we meandered through the garden, stopping to watch quail scurry across the path with bobbing head-crests, and exclaiming over a monarch butterfly on a wildflower, and letting the kids grind mesquite pods into flour at the grinding station.  When we got to the butterfly garden, there were hundreds of monarchs clustered on the mesh ceiling, very still, and just a few fluttering around the plants. The day was overcast and coolish, and the monarchs were sleeping in. It was a perfect day for photos around the garden, but the girls were disappointed that the butterflies were not landing on them, and they kept hopefully putting out their finger for butterflies to use as a perch (Thanks, Fancy Nancy, for making that seem reasonable.)


Isabel was close to crying because butterflies were not approaching her, even though we’d discussed M.A.N.Y. times that butterflies don’t land on fingers, and they don’t seem to land on you even if you wear yellow, and Daddy is just super-lucky that they always land on his jeans even though he’s the least interested in them of all (he attracts them, they way aloof people attract cats.)   So when we saw one butterfly resting wings open on a flower, the girls were excited to get really close and take a look.  “It’s wings are OPEN!” Isabel exclaimed. “Is it a moth?” We had learned that butterflies keep their wings closed when landed and moths keep them open. She and Elena discovered that it was a boy monarch.  The guide had explained: Boys have a black dot at the bottom of each wing; girls do not.

The butterfly was extremely cooperative, and lay there, wings open, as the girls got so close that their eyes crossed and their noses were almost touching it. It was SO cooperative, in fact, that I became certain that it was dead.  “I think,” I said carefully to the girls, “That butterfly might not be….alive…any more.”


A volunteer was hovering nearby, like a too-close saleslady in a department store, following you through aisles to make sure you are not planning to steal something. “Let’s not get too CLOSE!” he called in a fake chipper voice.  “Remember, we don’t touch the cute widdle wiggly budderflies!”

“This one is not very…wiggly,” I told him.  “It’s rather motionless. In fact, I think it’s deceased.”

The volunteer came closer and bent down.

“It’s antennae are all floppy,” Isabel complained. “And they’re not moving at all.”

“It’s brief time of mortality is over,” I explained. “It’s gone to the Great Butterfly In The Sky.”

The volunteer interrupted loudly, “This one is maybe having a TEENSY little problem. Just maybe. We’ll get a staffer to take a look at it later and see if it, ah, needs any, ah HELP.” He looked around to see who had been shattered, ruined, sent into a mental tailspin by my comment. Nobody seemed to have even heard, except for our small group.

“It’s beyond help,” I said to the general area. “The only help IT needs is to be boxed up and sent back to the mothership.”

The volunteer shot me a pained look.
“What?” I said. “Don’t you collect them when they die and count them and send them all back?”

“Ah, well, YES, but ah, I think this one just NEEDS A LITTLE HELP,”  he repeated firmly.

My daughter looked at him like you’d look at someone slow.

“We think it’s dead,” she told him, skipping around.

“Since it’s clearly no longer of this world,” I said to the volunteer, “Don’t you think it would be OK to let the kids touch it, just for a second? I mean, just one touch, to feel how soft and powdery a wing is. It won’t hurt it now, know what I mean?”

He ignored me and waved at a group of older kids, like 8 and 9 year olds. “This one is just RESTING!” he proclaimed desperately. “Sometimes they nap!”  The kids were not looking. They were asking their leader about lunch.

“Its legs are all shriveled up, “Isabel observed. “It looks kind of dry.”

“It just needs a little help!” the v. said, and then, “Are you on your way OUT now?”

I bent over to look at it. “It’s all part of their life cycle,” I told Isabel. “It’s a little bit sad when they die, but before they die, they lay lots and lots of eggs which will eventually turn into new butterflies that we can enjoy. Their life span is much shorter than ours.”

“I’m not sad, Mama,” she said, “I know there will be more of them.”

The volunteer shot me another look. “It may just need a LITTLE HELP!” he almost shouted. I thought he might be going to cry.

“Ok, let’s head on out now,” I said in my own chipper voice.  I was distressing him, clearly, and it felt mean, like poking a caterpillar on a branch.

I refrained, as I walked past the V., from hissing in a horrible scary-movie voice, “It’s DEEAADDD! AAARRRGGHGHH!”

His misplaced sense of protecting the innocents from the “harsh realities” of the butterfly life cycle was awesomely hilarious.  I always know I can count on the butterfly garden volunteers to do something wonderfully stupid and make my day complete.  It’s part of the whole package, and I love it! Butterflies…beautiful scenery…and some laughs. How can you ask for anything more?

Well, you can if you’re five. You ask and whine to stop in the Gift Shop on the way out. Luckily it was closed for renovations, and we were able to breeze right on out, enjoying the Chihuly Sculptures on last time on the walk back to the car.

Friends at the DBG


Pumpkin Patch Fun

Pony rides, gigantic black grasshoppers, and gourds that looked more like fish fins than squash — it was all part of our pumpkin patch adventures near Prescott this weekend.

There were the largest black grasshoppers I’ve ever seen, and a deer with long black eyelashes, and dried sunflower faces as big as a dinner plate. Isabel rode a pony named Pepsi and her friend Elena rode on Trigger, and the smiles on the girls were so gleeful that my heart welled up with joy.   I had never seen some of the strange gourds with fins and curves, looking more organic and odd than any pumpkin in our local bigbox grocery, resembling fish or protozoa instead of a squash. So when Isabel requested that we get some I eagerly agreed and helped her pick out some of the most otherworldly of them.  We enjoyed petting the goats, or not exactly PETTING them (their fur is greasy and bristly, not soft), but rather looking at their large gentle eyes and their pretty faces, and exclaiming over how cute they are! Over and over! How we loved them!  They tolerated our presence in their pen, as we side-stepped around piles of pellets and splashes of urine, and blinked their own gorgeous eyelashes as they looked off into the fields of wilted sunflower vines and hard earth, thinking who knows what in their hard goaty heads.


First Photo Of The Day

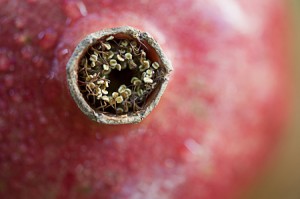
I’d gladly eat a few pomegranate seeds to get out of the blazing Phoenix heatoven at Summer’s peak; unlike Persephone, I’d welcome the cool respite.  I recently re-discovered the joys of fresh ruby pomegranate seeds, glittering in the sun like rubies and bursting in my mouth like tiny water spouts. Isabel liked them too, at least visually and in theory, although she spit them out after sucking them, and preferred — instead of ingesting  them –  to talk about how her cousins Ally and Toby had eaten great spoonfuls of them last time we visited in Chicago.

Right now the mornings are chilly and the evenings are cool, although the days still reach the upper 80′s and although we may get into the 90′s before it gets cooler for good.  And there are huge waist-high bins of pomegranates at the grocery store, sides bulging awkwardly with the ripe fruit, alongside the cartons of pumpkins and spaghetti squash. And I can’t resist them…their color and mythological intrigue enchant me, even if it’s cool enough now that I don’t need their cold curse, and I have to get one. We may even try making “fairy paint” using squashed pomegranate juice.  We’ve done this before and it was fun; we made a purple-ish reddish paint from pomegranate and blueberries, and a yellow one from leaves and turmeric. I mixed the juice with flour and oil to make paints, and Isabel loved this home-made craft!


Fall Fun

Crisp evenings and bins full of pumpkins at the grocery store mean that Fall is here, even if it’s still 89F during the day here in Phoenix!  If you’re craving some fun Fall pictures, get a pumpkin into the shot with your friends or family. Whether it’s in a pumpkin patch, a furtive cell-phone shot at the market, or a picture of your carving masterpieces at home, it’s a sure-fire way to get a smile worthy picture.   Here are some of my Fall favorites from the past few years.  Enjoy!

no images were found


Rule Of Thirds

Whether you’re a photography novice or an expert, it’s always fun and useful to review basic concepts. I’ve been shooting for years, and I love reading good articles about photographic composition — even if I “know” the rules, seeing fresh new examples helps spark new, creative ideas for me.


Rule Of Thirds

Composition “rules” were developed as people studied why certain photographs (and other works of art) were striking and eye-catching; by using some of these rules you can often improve your photography.


Basic: Off-center subject = photo that is pleasing and dynamic to the human eye. Don’t put your subject smack dab in the center of the frame!

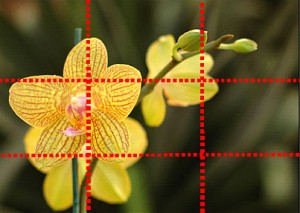
Details: Imagine that your picture is divided into thirds with lines, both horizontally and vertically. Place your main subject along one of the lines or intersection points for an interesting photo. You can also just shift your view so the main subject is slightly off-center.

Horizons: Don’t automatically put your horizon right in the middle of the picture. Photos can look more dynamic if you locate the horizon line at the upper 1/3 or lower 1/3 of the photo. Before you snap, test it out and decide where it looks best.

Rule of Thirds for Portraits: Try to fill the frame with a person’s head, shoulders, torso; locate the face and eyes at the 1/3 point. I automatically do this for snapshots unless I’m going for a full-body shot, head-shot, or something else. But my basic “go to” shot for quick grabs always uses the rule of thirds to locate the face and eyes.

Landscape and large scenes: Try to locate a main point of interest or a broad horizontal line in the portrait at a 1/3 point. You can also use leading lines to help guide a viewer’s eye through the photograph. (Leading lines are strong horizontal, vertical, diagonal or wavy lines that grab attention and pull the eye through a photo.)

Rule of Thirds for Close-ups: Sometimes an object looks better centered. But often it will look better off-center. Remember to test it out both ways before deciding!

Exceptions: If it looks better in the center, then leave it right there! Sometimes a centered image IS exactly what you need. You be the judge – test it both ways before deciding. Keep in mind that all rules are made to be broken, and that these are just starting points. You are always going to be the final judge on what makes a photograph meaningful and beautiful to YOU.


More Background: Where did the Rule of Thirds come from? It’s derived from The Golden Mean / Golden Rectangle. As far back as the ancient Greeks, artists and architects have used the Golden Mean in their work when designing. A golden rectangle is one whose length and height are related by phi, 1.618. Because this number occurs frequently in nature, it’s believed that people emulated it in art in order to represent the beauty and perfection that can arise in nature, or that people naturally LIKE things that have the golden ratio because subconsciously they appreciate this ratio which can often indicate the best possible natural scenario. Many scholars believe that the Parthenon in Greece was designed using 1.618 — the length and height are related in equation with 1.618. Leonardo da Vinci used the Golden Ratio extensively in his art, as did many other artists.